radiomaster-pocket-dat - ELRS-TX-dat - ELRS-TX-setup-motor-dual-dat
radiomaster-pocket-dat - radiomaster-dat - ELRS-dat - CRSF-dat - RC-dat
MDL setup
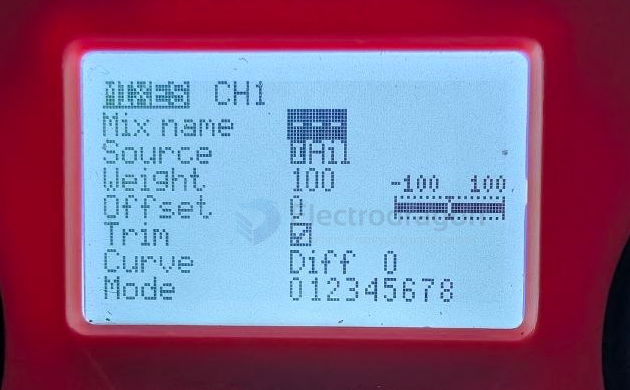
MIXES
Step 1: Navigate to the MIXES Screen
Turn on your RadioMaster Pocket.
Long-press the system roller (the clicky wheel on the right) to bring up the model menu, or press the MDL button if you have it assigned.
Use the roller to select Model Select, click your current model, and enter the model settings.
Press the PAGE> button (top right) several times until you see MIXES` at the top of the screen (usually Page 5 or 6).
Step 2: Configure CH1 (Forward Pin / IN1)
Roll down to highlight CH1, then press and hold the roller until a pop-up menu appears.
Select Edit and click the roller.
Change the following settings inside the CH1 edit screen:
Mix name: (Optional) You can name it FwdA
Source: Click, then move your Left Stick up and down until it shows Thr (or your preferred stick).
Weight: Change this from 100 to 50.
Offset: Change this from 0 to 50.
Press the RTN (Return) button once to go back to the main MIXES list.
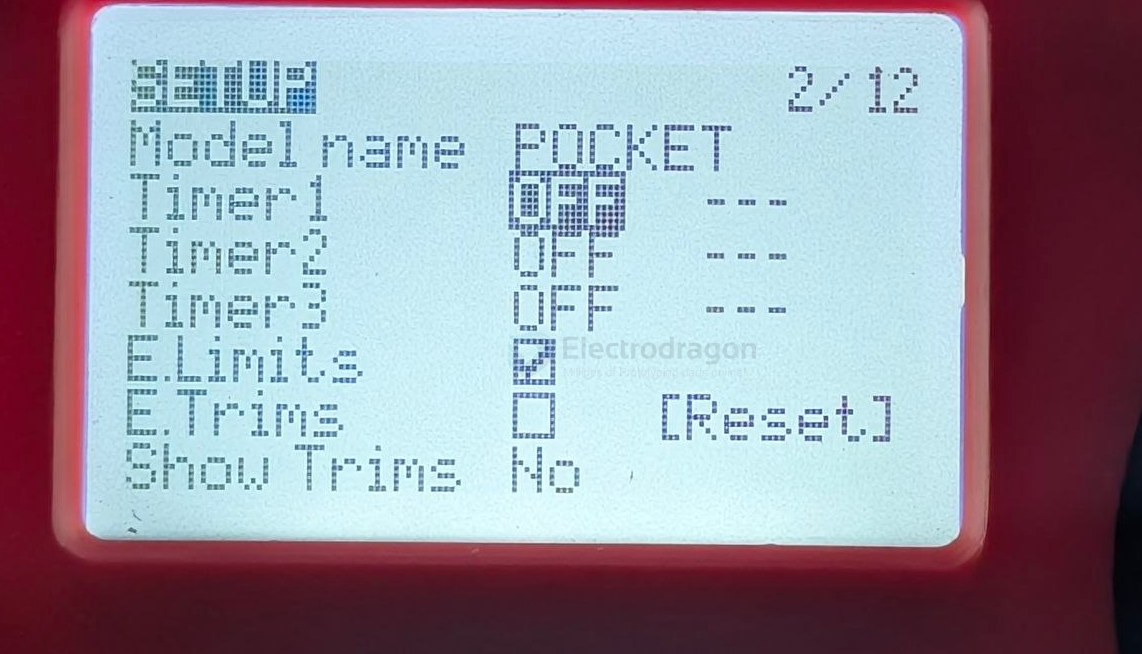
main setup at page 2
SYS setup
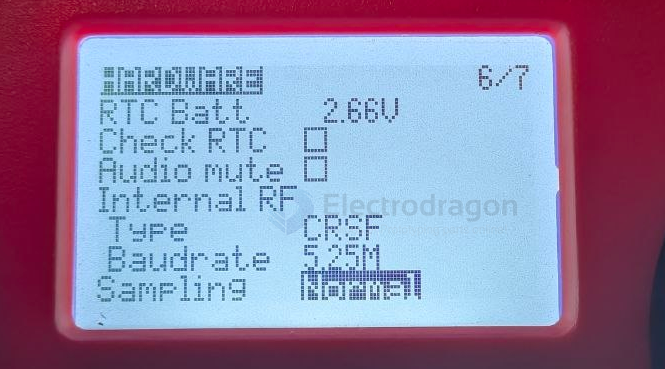
navigate to hardware page
Navigating to the H/W Page
Press and hold or simply press the SYS button to open the system settings.
Look at the very top right corner of your screen. You will see page tracking numbers like 1/7, 2/7, etc.
Press the PAGE> button repeatedly until you hitpage 6/7 (or 7/7 depending on your exact version).
Look at the top text label—it will say H/W. This is your Hardware page!
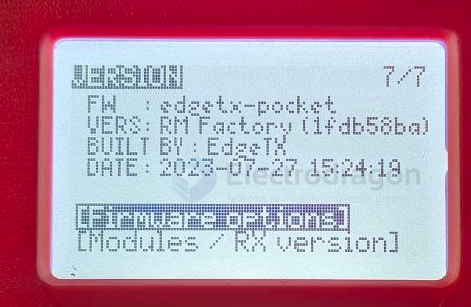
check version
Press the PAGE< button to 7/7
Internal RF vs. External RF Settings
On the RadioMaster Pocket, these settings tell the radio where to send the control signals depending on whether you are using the built-in transmission chip or an add-on module.
1. Internal RF (Built-In Module)
This controls the transmitter chip that is physically soldered inside the RadioMaster Pocket's body.
- What it powers: The built-in ExpressLRS (ELRS) 2.4GHz module (or CC2500 module, depending on your version).
-
When to use it: Turn this ON (set to
Mode: CRSFfor ELRS) when communicating directly with your drones or robots using the radio's native built-in antenna. - Power saving: Turn it OFF if you aren't using it to save battery life.
2. External RF (Expansion Slot Module)
This controls the pinned expansion bay located on the back of the radio handset.
- What it powers: Removable external hardware modules that you snap into the back slot (such as a TBS Crossfire Nano TX, a 915MHz ELRS module, or a multi-protocol module).
-
When to use it: Turn this ON (set to
Mode: CRSFfor Crossfire/External ELRS) only when you have physically plugged a module into the back bay. - Power saving: Keep this OFF unless a module is plugged in, as it routes live battery power directly to those back pins.
Summary Checklist:
| If you are using... | Internal RF | External RF |
|---|---|---|
| The radio's built-in ELRS system | CRSF | OFF |
| A module plugged into the back (e.g., Crossfire) | OFF | CRSF |
| A PC simulator via USB cable | OFF | OFF |
change baud rate
Step 2: Unlocking your Baud Rate
- Once you are on the H/W page, scroll all the way down until you see Internal RF.
- Right below where it says
Type: CRSF, you should now see Baudrate. - Change it from
400kdown to115k. - Turn your radio off and back on again to save the changes.
⚠️ One Final Reminder: Now that your radio is outputting at 115,200 bps, you must open your ExpressLRS LUA script (Short press SYS $\rightarrow$ ExpressLRS) and drop your Packet Rate down to 50Hz or 100Hz. If you leave it at 250Hz or 500Hz, the 115,200 baud wire speed will instantly bottleneck and cause sensor errors.
bootloader mode
Bootloader: Turn off the radio transmitter. Push both trim hat switches inward together and press the power button.
DFU: Turn off the radio transmitter. Plug in the USB cable to the USB port on the top of the radio. - STM32-DFU-dat - STM32-dat
Enter Bootloader Mode: Turn your RadioMaster Pocket completely OFF. Hold both horizontal trim buttons (T1 and T4) inward toward the power button while pressing the power button. The screen will say "EdgeTX Bootloader".
In the context of the RadioMaster Pocket, T1 and T4 refer to the horizontal trim switches situated directly below the gimbals. T1 corresponds to your Roll (Aileron) trim, while T4 corresponds to your Yaw (Rudder) trim.
version pocket
all buttons
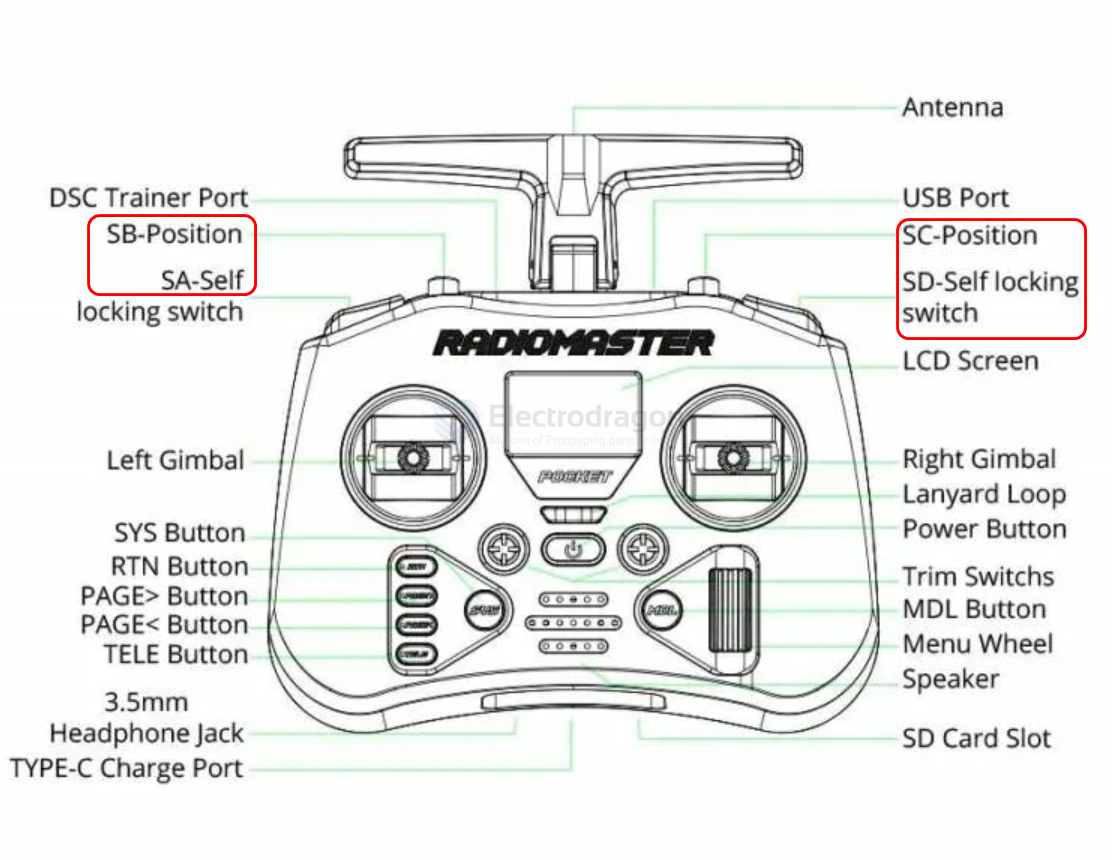
Default Stick Assignments
RC template
| Input | Type | default | modify |
|---|---|---|---|
| CH1 | Stick | Roll | |
| CH2 | Stick | Pitch | |
| CH3 | Stick | Yaw | |
| CH4 | Stick | Throttle | |
| CH5 SA | 2-pos Self-lock | Arm/Aux | |
| CH6 SB | 3-pos | Mode/Aux | |
| CH7 SC | 3-pos | Mode/Aux | |
| CH8 SD | 2-pos Self-lock | Aux | |
| CH9 SE | Momentary | Beep/Aux | |
| CH10 S1 | Knob | Trim/Aux |
| Channel | Function |
|---|---|
| CH1 | Roll (Aileron) |
| CH2 | Pitch (Elevator) |
| CH3 | Yaw (Rudder) |
| CH4 | Throttle |
| Switch / Knob | Type | Typical Use |
|---|---|---|
| SA | 2-position switch | Arming, auxiliary control |
| SB | 3-position switch | Flight modes, auxiliary control |
| SC | 3-position switch | Flight modes, auxiliary control |
| SD | 2-position self-locking switch | Auxiliary function |
| SE | Momentary (spring-loaded) | Beeper, auxiliary function |
| S1 | Rotary potentiometer | Auxiliary function, trims |
1. Radiomaster Pocket (Multi-Protocol Version)
- Uses CC2500 module, same chip used in FrSky radios.
- Supports FrSky D8, D16, Futaba SFHSS, Hubsan, and many more protocols.
- ✅ You can bind directly to FrSky D8 receivers.
2. Radiomaster Pocket (ELRS Version)
- Uses ExpressLRS only.
- ❌ Does NOT support FrSky D8/D16.
- You would need to use an external CC2500 module if you want D8.