ESP-IDF ES8311 - NS4150 - I2S Audio Example
I2S (Inter-IC Sound) is a digital communication protocol for transmitting audio data. It is a serial bus interface mainly used for digital audio data transfer between devices such as DSPs, DACs, ADCs, and audio codecs.
The ESP32-P4 includes one I2S peripheral. By configuring this peripheral, you can use the I2S driver to input and output sampled audio data. The ESP32-P4 board features an ES8311 codec chip and an NS4150B amplifier chip. The I2S bus and pin mapping are as follows:
- MCLK (Master Clock): Main clock signal, usually provided by an external device (MCU or DSP) to the ES8311 for its internal digital audio processing.
- SCLK (Serial Clock): Serial clock for I2S data transfer, generated by the master device to synchronize data rate. Each bit of audio data requires one clock cycle.
- ASDOUT (Audio Serial Data Output) / DOUT: Audio data output pin. ES8311 outputs decoded digital audio data here, which is then sent to the amplifier or other audio devices.
- LRCK (Left/Right Clock) / WS (Word Select): Indicates whether the current data sample is for the left or right channel. In I2S, one clock cycle is for left channel data, the next for right channel data.
- DSDIN (Digital Serial Data Input) / DIN: Receives digital audio data from external devices or the master. ES8311 decodes and processes this data internally.

| Function Pin | ESP32-P4 Pin | |
|---|---|---|
| MCLK | MCLK | GPIO13 |
| SCLK | BCK | GPIO12 |
| ASDOUT | DO | GPIO11 |
| LRCK | WS | GPIO10 |
| DSDIN | DI | GPIO9 |
| PA_Ctrl (Amp Enable, High Active) | GPIO53 |
The ES8311 driver for ESP32-P4 uses the ES8311 component, which can be added via the IDF Component Manager:
idf.py add-dependency "espressif/es8311"Open the i2scodec project and add the component as shown below:
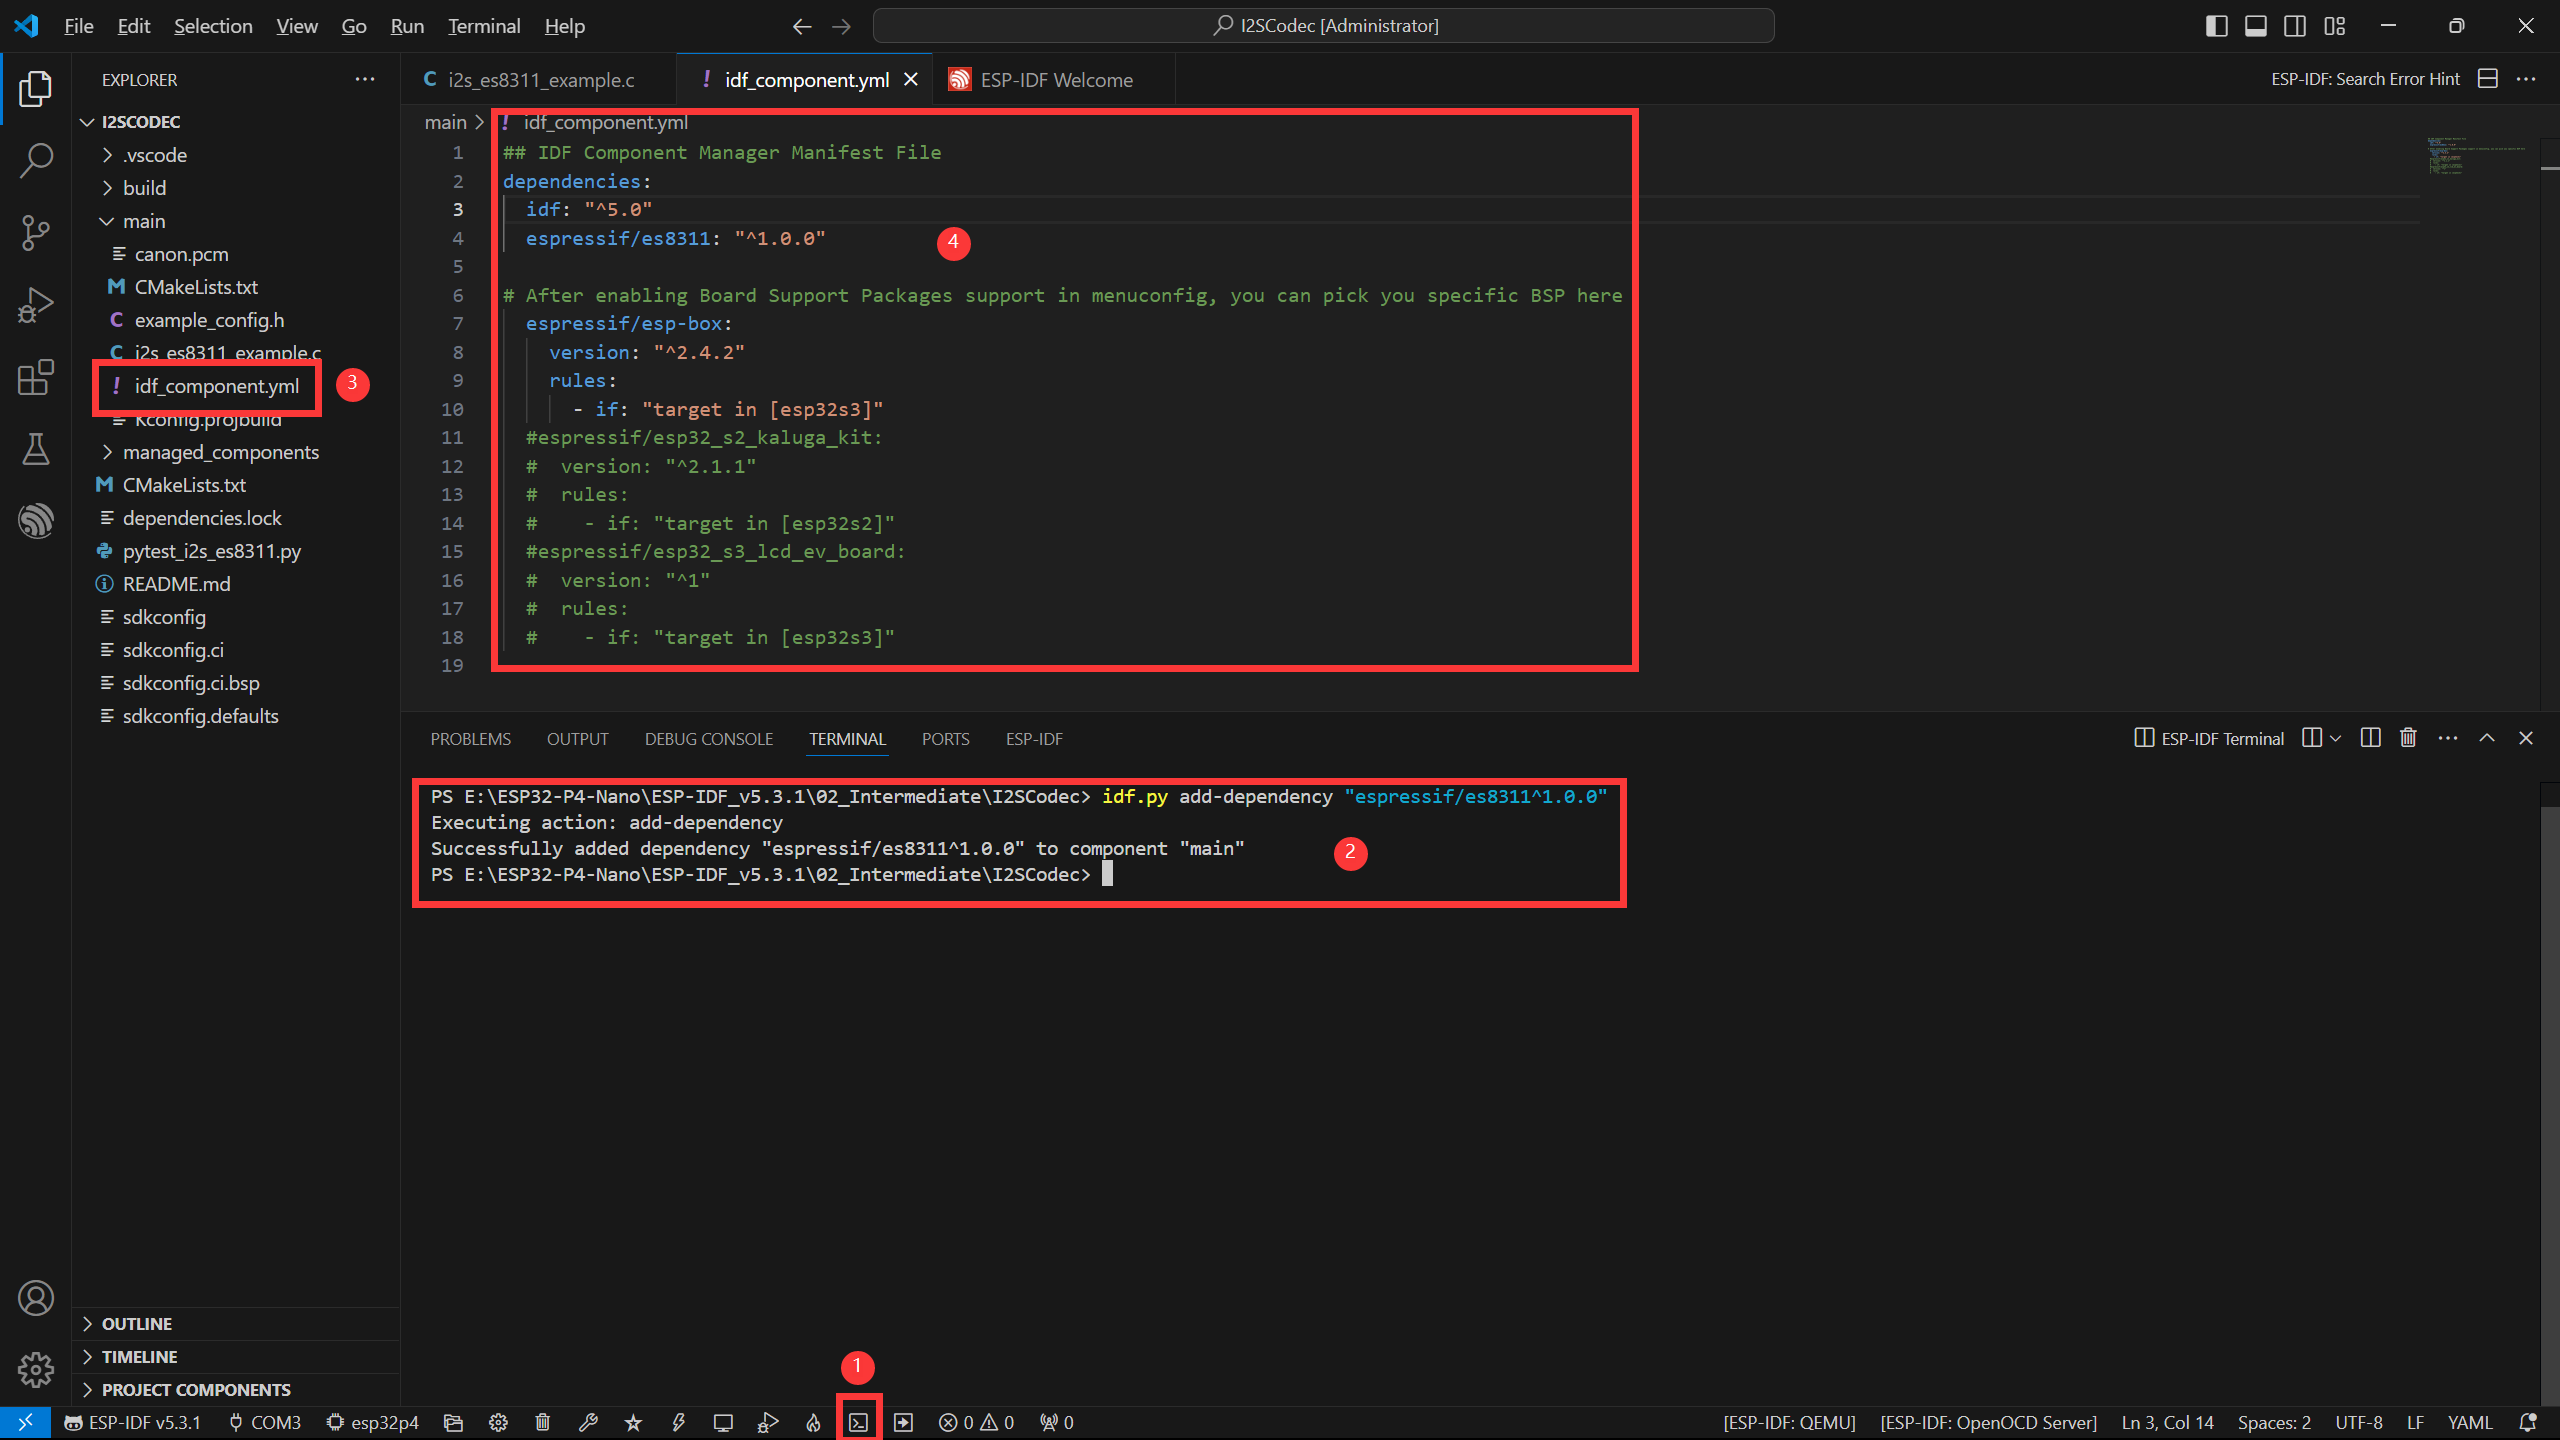
Steps:
- Open the ESP-IDF Terminal.
- Add the required component using the command above.
- After successful addition, an
idf_component.ymlfile will appear in themainfolder. This file manages project components. - You will see the
espressif/es8311component listed. It will be included during project build.
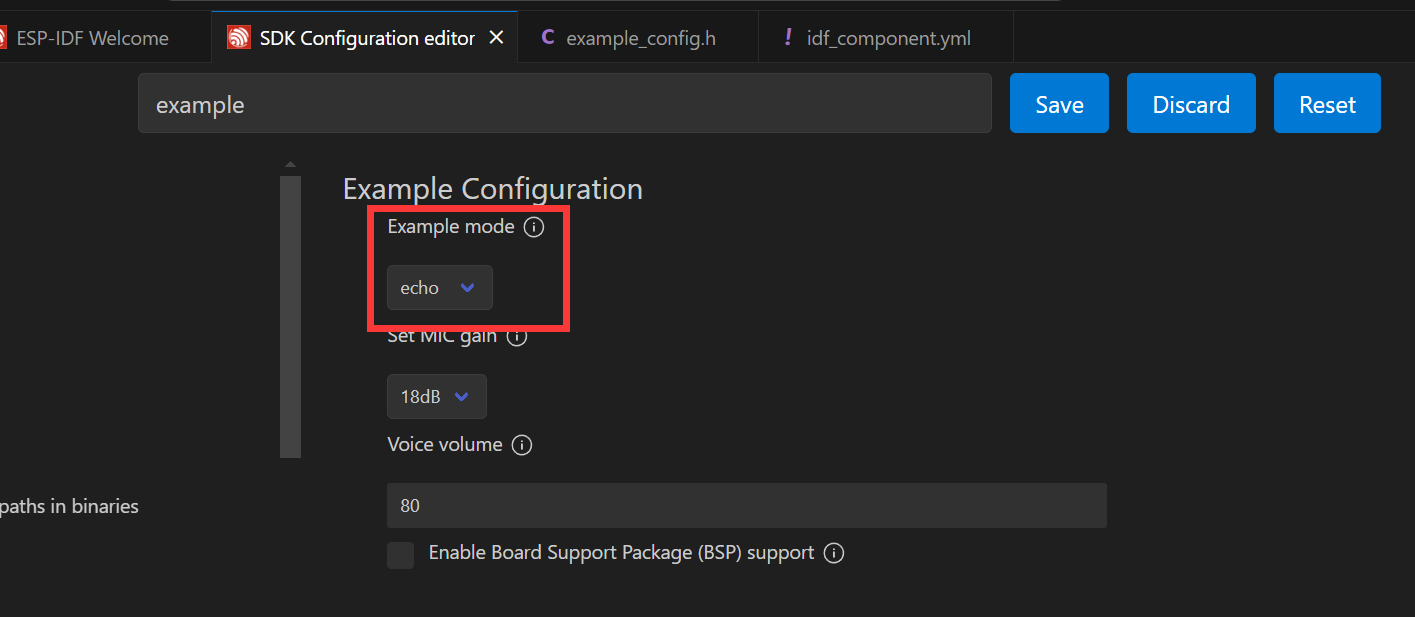
Next, click the ⚙️ (settings) icon, search for "Example", and adjust the volume as needed.

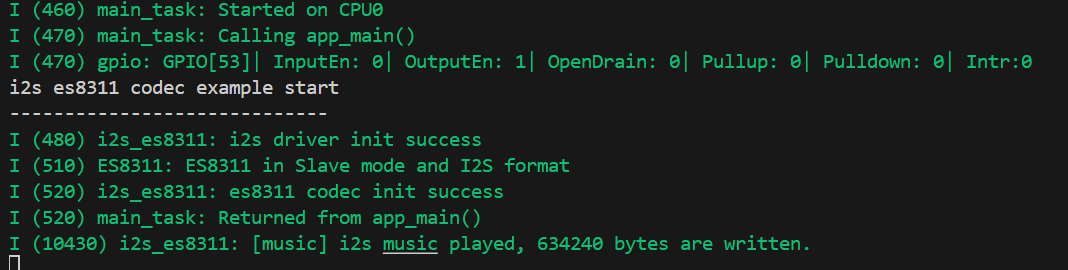
Connect a speaker, then click the 🔥 (build/flash/monitor) button. When complete, the terminal will show the result—your ESP32-P4 is now playing audio:
If you set echo mode in the settings, audio will be captured by the microphone and output through the speaker: